"The people who give you their food give you their heart" - Cesar Chavez


Showing posts with label Bread. Show all posts

Sunday, April 22, 2012

Flax & Almond Bread (Paleo & Gluten Free)

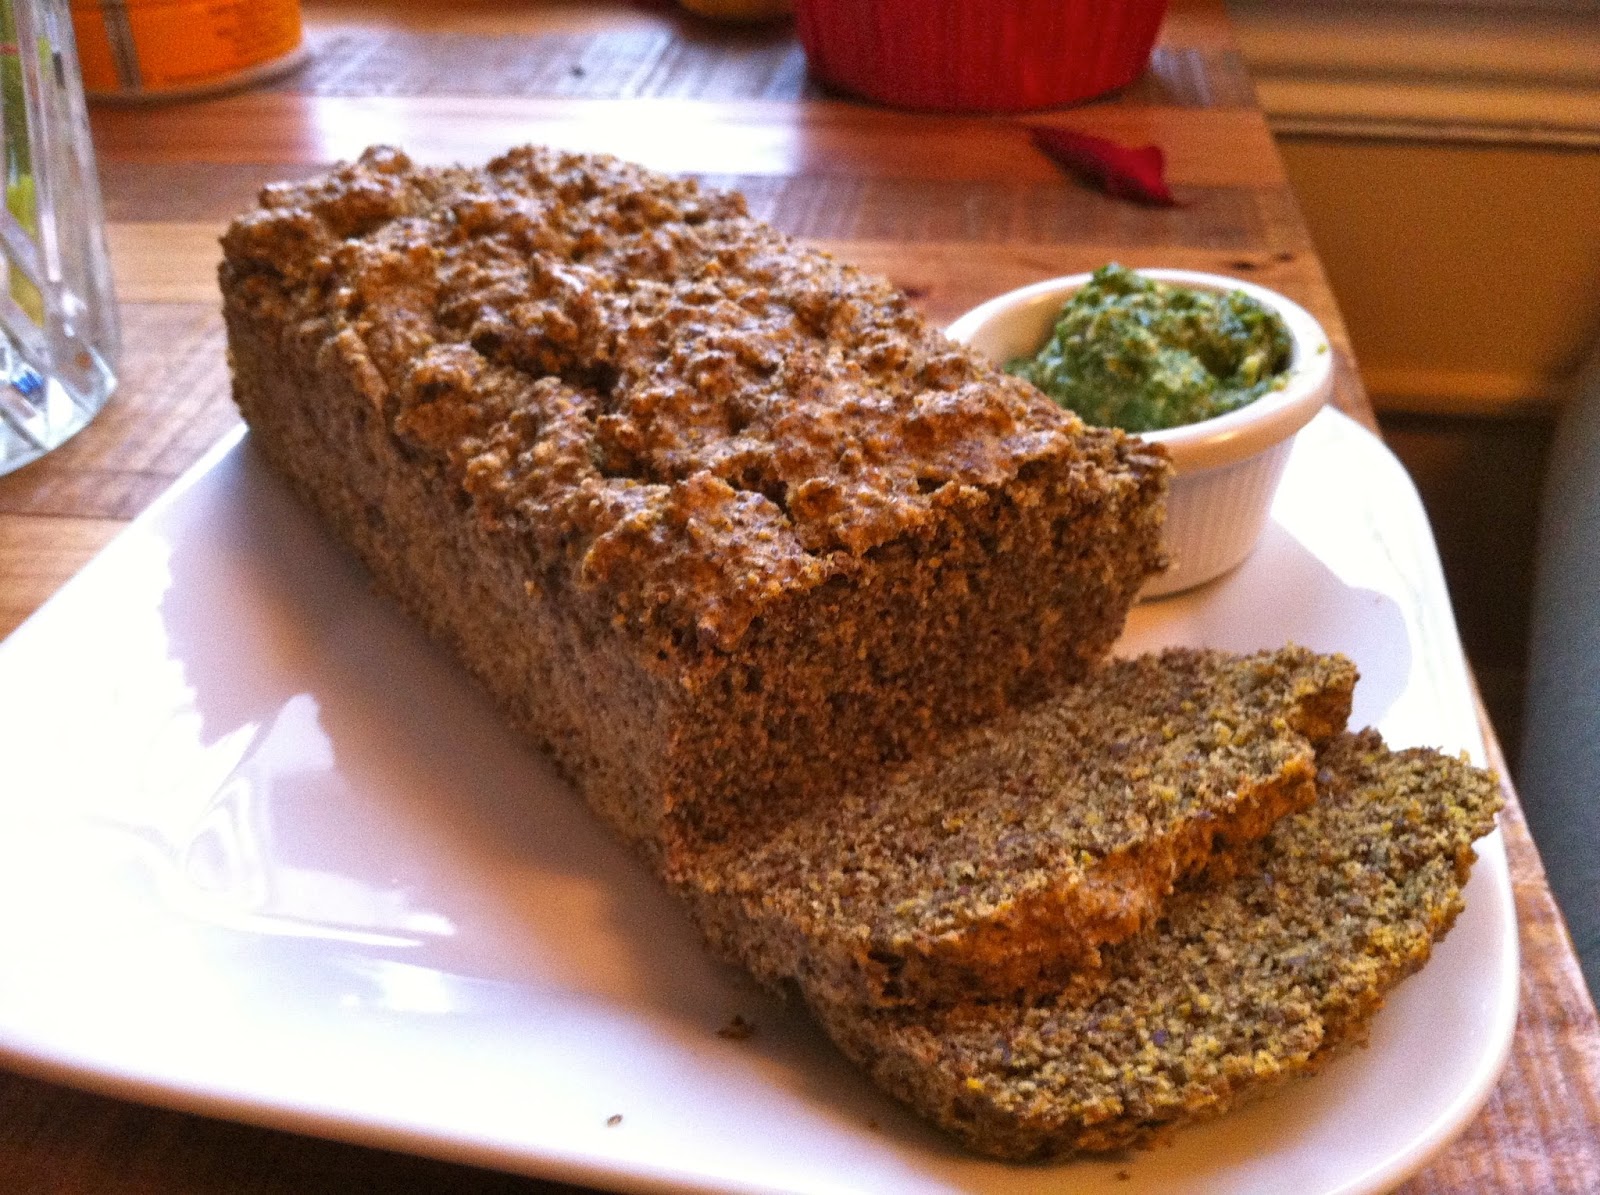
 I recently made a Paleo feast for 8 good friends. This bread is like an energy and fiber packed bread that is lovely alone, with dips and it keeps in the refrigerator for a little over a week.  Instead of flours, this "bread" is made with flax meal and almond meal. The finer the grind, the better the bread will taste. I grind my flax seeds in a mini mill. In addition, flax seeds need to be ground for us to get their full nutritional benefits, so always be sure to cook with flax meal as opposed to flax seeds. It's an extremely easy recipe and can definitely be jazzed up with pumpkin seeds sprinkled on top, or walnuts folded into the batter. I've also though this would taste nice with crushed dried herbs. Let me know if you come up with any good ideas! I served this bread warm with a paleo lemon walnut parsley pesto.
Flax & Almond Bread
Makes 1 loaf
Ingredients:
1 1/3 cups flax meal
2/3 cup almond flour
1 1/2 tsp cream of tartar
1 tsp baking soda
4 eggs
3 tablespoons olive oil
Salt & Pepper

Directions:
1. Turn on some nice tunes - Natalie Merchant recommended
2. Preheat the oven to 350 degrees Fahrenheit. Oil a loaf pan.
3. In a bowl mix the flax meal, almond flour, cream of tartar, and baking soda.
4. In a separate bowl vigorously whisk the eggs. This is where your love goes into the bread baking
5. Add the olive oil and a dash of salt and pepper to the eggs.
6. Add the dry mixture to the eggs mixture and mix.
7. Put mixture in the loaf pan. It will not be as wet or fluid as most bread batters, you will need to use a spatula to get the batter into the pan. If it is too dry, you can add a little more olive oil. 
8. Bake for 30 minutes.

Saturday, March 31, 2012

A Yogic Feast: Chapati, Dal, 2 Kinds of Salad

My good friend Sarah recently moved out to the Bay from NYC. We go back to freshman year in 2005 and I'm thrilled to have her home again. She and Erika came over for dinner one Wednesday and I was inspired to use my 'Yoga Cookbook' - a little gem I found in Varanasi, India. All the recipes are fro the Sivananda Yoga Vedanta Centres, which coincidentally also has an outpost in NYC...go figure! I also have a chapati pan I picked up in Pushkar, India for the equivalent to $1.50. I'd yet to use it so this Yogi feast was the perfect opportunity. The feast included whole wheat chapati, a slowly fermenting cabbage slaw, kale salad, and a delicious dal - all the recipes are included in this post. Sarah also has a professional camera so it was quite exciting to get some fancy looking food photos...finally! Check out my chapati pan with a piece cooking :) 
A little something about taking a midweek break for a calm, healthy, peaceful meal with loved ones...or just yourself since we all deserve self love. Sometimes life can feel like a continuous rat race of always trying to get ahead and yet - we'll never get there. But it's also a continuous adventure. I've found that at times when I may struggling against the enemy of overwork, unwholesome food, or stress - I can develop an inner strength by taking the time to have a mindful meal and more so, by sharing food with friends. Your meals aren't only cleansing for your body but also for your soul...
Chapati
(makes about 18)
Chapati are the standard flat bread throughout Northern India. Made slightly different in each region, I loved the chapati on the treks.  You can use chapatis as a spoon for stews, dal or raita. 

Ingredients:
250g whole wheat flour
1 teaspoon salt
175ml of water
ghee

Directions:
1. Combine the flour and salt. Gradually mix in the water until the dough binds together. Knead for about 10 minutes. 
2. Oil a bowl, turn the dough twice in it, then cover with a damp dish towel. Leave the dough to sit for one hour, then knead it again. 
3. Form the dough into small balls. Flatten them and roll into thin disks. As thin as you can without tearing them. Repeat turning the chapati in circles as you roll them, so you can make them evenly thin. The more symmetric the rounds are, the more they will puff up. It's tricky the first time around, like all things, you'll get better with practice.
4. Turn your burner on high and put the chapati pan on it. You can also use a skillet if you do not have a chapati pan. There should be NO grease on the pan. Cook the chapati on each side for a few seconds until it puffs up and gets golden brown. It helps to have a damp cloth handing to press down on the sides of the chapati for even puffing.
Lentil Dal
(Serves 5)
Many Indian & Middle Eastern dishes call for turmeric. While in Bahrain I learned of the health benefits of turmeric. Many women take a turmeric tea every morning to maintain memory and fight off Alzheimer's. The spice is also warming and a good stomach and appetite regulator. If you have a cold or cough, try boiling some turmeric with hot milk.

Ingredients:
200g red lentils
750 ml water
1 teaspoon turmeric
1 bay leaf
1 tablespoon ghee
1 teaspoon powdered mustard
1 teaspoon cumin
2 teaspoons ground coriander
2 tomatoes, coarsely chopped
1 teaspoon salt
1 tablespoon lemon juice
1 handful chopped fresh cilantro
1/2 butternut squash, chopped

Directions:
1. Roast the butternut squash in the oven at 400 degrees for 30 minutes, or until cubes are easily pierced with a fork. Set aside.
2. Place the lentils in a pan with the water, turmeric and bay leaf. Bring the pan to a simmer for 15 - 20 minutes, until the lentils are tender. Careful, tenders can easily get mushy - there is definitely a tipping point. 
3. While lentils are simmering. Heat the ghee in a skillet. Add the cumin and mustard over high heat for 1-2 minutes.
4. Add the coriander, tomatoes and cook for 5 minutes. Then add the butternut squash and add the mixture to the lentils. Add the salt and lemon juice. Stir to get the mixture a little thicker. Stir in the chopped cilantro. Serve warm :)

Optional Add-Ins:
Chopped onions - add these in with the tomatoes
Fake meat - add this in the tomatoes
Chopped boiled potatoes - add in with the tomatoes
Slowly Fermenting Cabbage Slaw
I love making a tub of this at the beginning of the week and adding some to my lunches each day. This really does get better as the days go by. I haven't perfected this recipe yet - but this is a good start. Also, as the days pass, this dish takes on a gorgeous fucsia color.

Ingredients:
1 small red cabbage, thinly sliced
2 tablespoons sesame oil
1/4 cup rice vinegar
1 tablespoon lemon juice
3 cloves garlic, smashed in a mortar and pestle 

Directions:
1. Slice the cabbage and place in a bowl.
2. In a mason jar (that has a lid!) combine the sesame oil, rice vinegar, lemon juice and smashed garlic. Shake vigorously until combined. Pour over the cabbage and toss to evenly incorporate. You should taste it at this point and add more of any of the ingredients to suit your liking.
Kale Salad
The options are infinite but a favorite combination of mine is kale, avocado, sliced white onion, and hard boiled egg. All with a simple dressing of olive oil, lemon juice, balsamic vinegar, and a little mustard.

Friday, March 30, 2012

Erika's Delicious Juicer-Pulp Cake

My good friend Erika came over for dinner and brought a DELICIOUS juicer-pulp cake. It was moist, tasty, and the perfect dessert to our yogi feast. I don't have a juicer, but I may have to get one just so I can make this cake with the pulp! She also made a ricotta-honey sauce that had the perfect level of tartness and sweetness to compliment the cake. This cake is gluten free and can easily be made paleo!
Erika's Delicious Juicer-Pulp Cake
(Makes 1 loaf)

Ingredients:
2 C. Juicer Pulp 
1/2 C. Agave
1/2 C. Coconut Oil, Melted 
1 egg
1 C. Unsweetened nutmilk
1 1/2 C. Flour-- I split this between coconut flour and white rice flour
1 Tsp. Baking Soda
1/2 Tsp. Cinnamon
1/2 Tsp. Sea Salt

Directions:
1. Pre-heat the oven to 350 degrees
2. In a large bowl, add the juicer pulp, agave, coconut oil, egg and nut milk, mix to combine
3. Add in flour, baking soda, cinnamon and salt with wood spoon.
4. Bake for 15-20 minutes, or until a tester comes out clean
Enjoy! Thanks Erika for sharing!

Tuesday, March 13, 2012

INTRODUCING: My Amazing Baking Roommate & Mad Dough Bread Co

                             
My roommate, Nichole, is very impressive for a number of reasons. One of which is her natural knack for bread baking. She comes home from work and is like a mad scientist in the kitchen, filling some Tupperware container with a combination of yeast, water and other secret ingredients and letting these containers rise in cupboards or set in our fridge. Then she'll be kneading, shaping and glazing breads which always come out looking beautiful and tasting wholesome, hearty and delicious.  She recently made homemade pizza on homemade pizza dough with homemade ricotta - on one Wednesday night! She's started Mad Dough Bread Co to bring her healthy, made-with-love, organic breads to the Bay.

She also shares her knowledge so now anyone can Bake Fresh Artisan Breads with Nichole of Mad Dough Bread Co. I had the opportunity to experience one of her classes and I had no idea bread was such a science! The photo above is of her starters which she prepped for the class the evening before. We were making baguettes. 
Here is Nichole explaining the starters to us:
Then we mixed the starter with flour, salt, yeast
The Bread I chose was a variation of Peter Reinhart's French Bread using Guisto's whole wheat and white bread flours. Wheat flours makes the bread slightly denser, but adds a ton of fiber, protein and flavor lost in the white flour sifting process.

This is a multi-day bread (most are) but worth the effort in the complex taste and structure that results from letting the flour, water, salt and yeast ferment overnight. That being said, I had to prepare the dough ahead of time, but led the group in mixing the dough themselves, demonstrating the texture, temperature and technique that are the key to making any kind of bread.


Makes 2 large loaves, 4 small loaves, or many rolls.

2.5 cups (12 oz / 340 g) whole wheat bread flour
2.5-3 cups (12 oz / 340 g) unbleached bread flour
2 teaspoons (0.5 oz / 14 g) salt, or 1 tablespoon coarse kosher salt
2-1/4 teaspoons (0.25 oz / 7 g) instant yeast
2 cups (18 oz / 454 g) lukewarm water (about 95°F or 35°C)

1 to 4 days ahead of time:

Combine all of the ingredients in a mixing bowl. If using a mixer, use the paddle attachment and mix on the lowest speed for 1 minute. If mixing by hand, use a large spoon and stir for 1 minute, until well blended and smooth. If the spoon gets too doughy, dip it in a bowl of warm water. The dough should form a soft, coarse shaggy ball. Let it rest, uncovered, for 5 minutes.


Knead for 10 minutes on a lightly floured work surface, adjusting with flour or water as needed. The dough should be as soft as it cane be without being sticky.


Check out that freshly baked challah in the background! She made it that morning before the class!
Transfer it to a clean, lightly oiled bowl. Cover the bowl with plastic wrap, then immediately refrigerate overnight or for up to 4 days.

[If the dough feels too wet and sticky, do not add more flour; instead, stretch and fold it one or more times at 10-minute intervals before putting it in the refrigerator. (If you plan to bake the dough in batches over different days, you can portion the dough and place it into two or more oiled bowls at this stage.]

Baking Day:

Remove the dough from the refrigerator about 2 hours before you plan to bake. Gently transfer it to a lightly floured work surface, taking care not to degas. For baguettes and batards, divide the cold dough into 10-ounce (283 g) pieces; for 1 pound boules, divide the dough into 19-ounce (53 g) pieces; and for freestanding loaves, use whatever size you prefer.

Form the dough into batards and/or baguettes (stretch from the ends) or boules (gently tuck underneath to form a ball) and place on parchment. Mist the top of the dough with spray oil, loosely cover with plastic wrap, and proof at room temperature until increased to 1-1/2 times its original size (60-120 minutes).

About 45 minutes before baking, preheat the oven to 550°F (288°C) or as high as it will go, and place an empty metal baking dish or sheet on the bottom shelf (don't use glass! - It will shatter).

Just prior to baking, score the dough 1/2 inch deep with a serrated knife or razor. Transfer the dough to the oven, pour 1 cup of hot water into the steam pan, then lower the oven temperature to 450°F (232°C).

Bake for 12 minutes, then rotate the pan and bake for another 15 to 25 minutes, until the crust is a rich golden brown, the loaves sound hollow when thumped, and the internal temperature is about 200°F (93°C) in the center. For a crisper crust, turn off the oven and leave the bread in for another 5 minutes before removing.


Letting the dough balls rise...
Making them into baguette shapes
Don't forget to make little cut marks up top


VIOLA!!
Cool the bread on a wire rack for at least 45 minutes before slicing or serving.

Variations:

By simply varying the method so that the shaped loaves undergo cold fermentation, rather than the freshly mixed bulk dough, you can create a spectacular loaf with a distinctive blistered crust. After the dough is mixed and placed in a clean, oiled bowl, let it rise at room temperature for about 90 minutes, until doubled in size. Divide and shape as described above, mist with spray oil, then cover the shaped dough loosely with plastic wrap and refrigerate it overnight (or up to 4 days), away from anything that might fall on it or restrict it from growing.
Remove the dough from the refrigerator 1 hour before baking and place on parchment paper. It should have grown to at least 1-1/2 times its original size. While the oven is heating, remove the plastic wrap and let the dough sit uncovered for 10 minutes. Score the dough while it's still cold, then bake as described above.

Monday, August 22, 2011

Healthy Blueberry Bites

I think that mini muffins are a very American comfort food. Who doesn't love to see these bite size goodies at home, work or a party. These ones are more breakfast / energy muffins than dessert muffins. Made with complete healthy ingredients and blueberries for sweetness. These blueberry bites taste great with almond butter or apricot jam. These recipe is adapted from the wonderful kid's cookbook Healthy Yummies of Young Tummies. 
Healthy Blueberry Bites
Makes 28 mini bites

Ingredients:
2 1/4 cups whole wheat flour
1/4 cup oat bran
1 1/4 teaspoon baking soda
2 eggs whites, lightly beaten
1/3 cup honey
1/4 cup safflower oil
1 3/4 cups soy milk
2 cups frozen blueberries
Pumpkin seeds for garnish

Directions:
1. Lightly butter the mini muffin tins.
2. Preheat oven to 400 degrees
3. In a large bowl combine the dry ingredients. In a separate bowl beat the eggs whites, honey, oil and soy milk. Pour the liquid ingredients into the dry ingredients, stirring until moistened.
4. Fold in the blueberries.
5. Spoon the mixture into the muffin cups, filling each about 2/3 full. Sprinkle pumpkin seeds on top.
6. Bake for 15 - 20 minutes or until lightly browned - Enjoy!

Monday, August 15, 2011

Chickpea Flatbread

As part of my Farmer's Market Feast we created a flat bread made with chickpea flour instead of all purpose flour. This is a gluten free, healthy and flavorful substitute for traditional flat bread. My original idea for this came from the chickpea pizzas that were all over Northern Italy. We had this flat bread with simple cheese and herb toppings, but this can easily be the base for a tomato sauce and actual pizza toppings. For this I used  Bob Mill's chickpea flour and rosemary from the the street side planter boxes on Brannan Street between 2nd and Delancy. As a topping we used grated Capricious Goat Cheese from the Achadinha Cheese Company in Petaluma.
Ingredients:
2 cups chickpea flour
1/2 plus 1/4 teaspoons salt
3 cups water, divided
2 teaspoons minced fresh rosemary
9 tablespoons olive oil, divided
9 tablespoons capricious goat cheese, grated
Ground pepper
Garlic powder
Za'tar

Directions:
1. Sift the chickpea flour and salt into a large bowl.
2. Gradually add 1 cup of water, whisking until smooth.
3. Whisk in the remaining water. Add in the rosemary. Let mixture stand for 30 minutes.
4. Preheat the broiler.
5. Drizzle a large non-stick oven proof skillet with 1 tablespoon of olive oil. Pour 1/3 of the batter into the skillet. Drizzle with more olive oil. Cook until the top is almost set - about 4 minutes. Pierce the bubble with a knife.
6. Sprinkle with 3 tablespoons of grated cheese and sprinkle some ground pepper. Here you can sprinkle on the garlic powder and za'tar if you want.
7. Place skillet in broiler until golden - about 4-5 minutes. Slide onto a platter or cutting board and cut into wedges. 

Monday, June 27, 2011

Healthy Zucchini Bread with Farina di Castagne

If it isn't already obvious - I'm on a bit of a quick bread craze. And the one over arching theme has been to find healthy substitutes for classic American quick bread recipes. When I was working at Cefalicchio this past summer I made zucchini bread with zucchinis from their garden for the guests and the guests all thought it was so exotic. Zucchini bread is a very American dish. It is delicious, especially with pieces of chocolate and similarly to banana bread, there is a lot of room to make it healthy. In Italy, I often made desserts using farina di castagne - which is flour of chestnuts. It's a delicious flour that gives an almost spicy taste to any sweet. It is tricky to work with though because unless the recipe is designed around the chestnut flour - this nut flour should be treated differently and requires different levels of liquid measurements to retain moisture. I am still on the prowl for a comprehensive site that describes how to properly substitute the plethora of flours.

Healthy Zucchini Bread with Farina de Castagne.
(Makes two loafs)

Ingredients:
3/4 cup farina di castagne
2 1/4 cups whole wheat flour
1 teaspoon baking powder
1 heaping teaspoon ground cinnamon
1/2 teaspoon salt
1/4 teaspoon baking soda
3 eggs
1/4 cup honey
1/3 cup olive oil
1 heaping teaspoon grated lemon rind
1 teaspoon almond extract
1 1/3 cups sugar
3 cups shredded zucchini (12 ounces)
1/3 cup coarsely chopped walnuts
1/4 cup flax meal
1/3 cup raisins
Pumpkin seeds to garnish
 
Directions:
1. Preheat the oven to 350 degrees Fahrenheit. Butter and flour two loaf pans.
2. Mix the farina di castagne, flour, baking powder, cinnamon, salt, flax meal and baking soda in a mixing bowl.
3. In a separate bowl beat the eggs and mix with the honey, olive oil, lemon rind, almond extract and sugar. Add the wet ingredients to the dry ingredients and mix until incorporated. Mixture will be tough and dry.
4. Add in the shredded zucchini and, as you mix, the moisture will be extracted from the zucchini and make the batter more manageable.
5. Add in the chipped nuts and raisins and mix just until combined.
6. Pour batter evenly into two loaf pans. Sprinkle with pumpkin seeds.
7. Bake for 40 - 45 minutes or until a tester comes out clean.

Sunday, June 26, 2011

Mango Banana Bread

I've definitely been on a quick bread kick. First it was the compost muffins, then the banana bread with flax meal, now brought to you with the world's number one consumed fruit....MANGOES. It's pretty much a guarantee that I will love anything with mangoes. The mango adds a gorgeous color to this bread and the fruity texture is a pleasant surprise. Baked mangoes are delicious - as tested in the strawberry mango crumble, mangoes are sweet enough to add flavor but not too pungent where they will contrast negatively with other fruits or vegetables. You can definitely add nuts to this - I just didn't have any. I would recommend Brazil nuts or pecans. Enjoy!

Mango Banana Bread
(Makes two loafs)
Ingredients:
1/3 cup coconut flour
2/3 plus 1/2 cup whole wheat flour
3/4 cup flax meal
3/4 cup oat bran
1/2 cup brown sugar
1 tsp baking soda
1 tsp baking powder
1/2 tsp salt
2 tsps cinnamon
3 ripe bananas
2 cups mango chunks
1 1/2 cups dried cranberries
1 cup soy milk
2 eggs
1/4 tsp almond extract

Directions:
1. Preheat the oven to 350 degrees Farenheight, butter two loaf pans.
2. In a large mixing bowl, combine the flours, flax meal, oat bran, brown sugar, baking soda, baking powder, salt and cinnamon.
3. In a separate bowl mash the bananas, add in the mango chunks, dried cranberries, soy milk, eggs and almond extract. Mix the wet ingredients into the dry ingredients until incorporated.
4. Spread the batter evenly into the loaf pans.
5. Bake for 45 minutes, or until a tester comes out clean.

Monday, June 13, 2011

Healthy Banana Bread with Flax Meal

I had no idea banana bread was so versatile until I started really experimenting with it. This whole health-ifying baked goods was inspired by my roommate, Nichole's, compost muffins. Learning how to properly incorporate flax meal and understand flour substitutions has opened many doors in the realm of baked goods and quick breads. One flour I have recently enjoyed experimenting with is coconut flour. It has more fiber than enriched white flour and it is gluten free if you are ever cooking for people with gluten allergies. I always loved banana bread but it is easily made too sweet and more of a dessert than a solid feel-good breakfast. This banana bread tastes delicious and can be a dessert, however, more importantly, it can be a great start to your morning. My two good friends, Natalie and Maxine, and I recently went to the Carnival festival in the Mission. We picked up some plantains on our way home and made it a night of banana bread and plantains. Basically we love bananas. I was out of eggs and the quick-mart under my apartment was closed so I went to the bar downstairs and they gave me two eggs in exchange for a promise of warm banana bread upon completion. I followed through on the promise and now I never need to worry about not having eggs! Here is a picture of Natalie, Maxine and I on a stoop at the festival before banana bread time:
Healthy Banana Bread with Flax Meal
(Makes 2 loaves)

Ingredients:
1/3 cup coconut flour
2/3 cup plus 1/2 cup whole wheat flour
3/4 cup flax seed - meal
3/4 cup oat bran
1/2 cup brown sugar
2 tsp + 1 pinch baking soda
1/2 tsp salt
2 tsp cinnamon
2 ripe bananas
1/3 cup almond butter
2 apples, shredded
1 cup craisins
1 cup Brazil nuts, chopped
3/4 cup soy milk
2 eggs
1/4 tsp almond extract
1/3 cup pumpkin seeds

Directions:
1. Preheat the over to 350 degrees Fahrenheit. Lightly butter two loaf baking pans.
2. In a large bowl mix together the flours, flax meal, oat bran, brown sugar, baking soda, salt and cinnamon.
3. In a separate bowl mash the bananas and add the shredded apple, soy milk, eggs and almond extract. Whisk until the eggs are beaten. Add in the almond butter  and mix until incorporated.
4. Mix the dry ingredients into the wet ingredients. Add in the chopped nuts and craisins and incorporate.
5. Pour mixture into two loaf pans. Sprinkle with pumpkin seeds. Bake for 35-45 minutes. Enjoy!

Sunday, June 12, 2011

Nichole's Compost Muffins (aka Energy Breakfast Muffins)

My awesome roommate, Nichole, made these delicious and healthy muffins for a recent camping trip with her family. Lucky for me - her fam didn't eat them all so I got to try the left overs and they were fantastic! They are whole grain, feel-good muffins. Her recipe has been adapted from this Bob's Red Mill recipe. I learned from Nichole that in order to get the nutrients from flax seeds, they have to be ground up into flax meal. Ground Flax seeds are a good source of Omega 3 Fatty Acids. You can buy flax seeds and ground them yourself, as we do, or you can buy the flax meal. The nutrients in ground flax seeds are more easily absorbed. HERE is a great source of information on flax seeds. These muffins taste great alone or with some peanut butter. My friends, Natalie & Maxine, love these muffins with a spread of butter too. Enjoy!


Nichole's Compost Muffins
(Makes about 15 muffins)

Ingredients:
1 1/2 cups whole wheat flour
3/4 cup brown flax meal
3/4 cup oat bran
1/2 cup brown sugar
1 tsp maple cream
2 tsp baking soda
1 tsp baking powder
1/2 tsp salt
2 tsp cinnamon
1 1/2 cups finely shredded carrots (about 3 carrots)
2 peeled and shredded apples (about 2 apples)
1/2 cup raisins
1 cup chopped walnuts
3/4 cup vanilla soy milk
2 beaten eggs
1/3 cup pumpkin seeds


Directions:
1. Preheat the oven to 350 degrees
2. In a large bowl, mix together flour, flax  meal, oat bran, brown sugar, baking soda, baking powder, salt and cinnamon.
3. Stir in the carrots, apples, raisins and nuts. Combine milk, beaten eggs and maple cream. Pour liquid ingredients into dry ingredients. Stir until ingredients are moistened. Do not over mix.
4. Fill muffin cups 3/4 full. Sprinkle pumpkin seeds on top. Bake for 15-20 minutes. Cool, enjoy.

Wednesday, March 9, 2011

Garlic Bread on San Francisco Sourdough

I've had a lot of garlic bread in my life - at restaurants, friend's homes but I've found that I tend to be...well, bored with most garlic breads. They are either too lightly flavored, stale, poor quality bread and really I just don't care for it. However, my mom has taught me the secrets to preparing the a fool-proof delicious garlic bread and all of it depends on the quality of bread - sourdough bread (Sorry east coasters!) When it comes to high quality sourdough bread, San Francisco is where it's always been. There are disagreements as to which bakery makes the best bread - but every time we make garlic bread we use the Semifreddi's bread, available only in Northern California. Here is a picture of the bay :)
Garlic Bread on San Francisco Sourdough

Ingredients:
1 loaf of Semifreddi's Sourdough
Butter
Garlic powder
Parsley, minced
Paprika

Directions:
1. Preheat oven to 375 degrees.
2. Slice the loaf in half lengthwise but not all the way so that the halves are still attached. Pry open and spread butter on both sides of the loaf making sure to go all the way to the ends.
3.Generously sprinkle the garlic powder over the two halves. Sprinkle on the parsley. Lightly sprinkle paprika.
4. Place the two halves back together and cut thick slices in the bread, again leaving the spine intact.
5. Put the loaf in a paper bag in oven at for 15-20 minutes or into it smells so good you can't wait.

Friday, December 31, 2010

Breakfast Brioche at Cefalicchio

In addition to granola, freshly baked brioche were also a staple at the Cefalicchio breakfast buffet. I was so happy to learn how to make these delightful breakfast rolls from Annie - the CIA student who was visiting Cefalicchio while I was there. I would make a new batch of brioche dough every two to three days and the brioche were rolled and baked fresh daily. Any leftovers can be used to make a superb brioche bread pudding with any seasonal fruit. They are best served warm with a selection of homemade jams. I promise these brioche will be a crowd pleaser and are all the reason to host a brunch pot luck with your friends. I apologize but I forget how many brioche rolls can be made from one recipe...I think thirty rolls. Also,  if you don't want to use all the dough in one sitting you can cover it and keep it chilled for up to three days. If you are planning on making these for a party I recommend making the dough ahead of time and just rolling out and baking the brioche before guests arrive. Before you start to make the dough you should set out the butter at room temperature for at least twenty minutes so that it gets really nice and soft. Finely, you will notice this recipe is in metric weights, I highly recommend purchasing a metric scale as your ingredient measurements will be much more precise.

Brioche

Ingredients:
500 grams Bread flour
200 grams Eggs
13 grams Salt
6 grams Yeast
116 grams Milk
251 grams Butter (very soft)
75 grams Sugar

Directions:
1. Weigh the ingredients out and set out the butter.
2. Combine the eggs and milk in a kitchen aid bowl and mix lightly.
3. In a separate bowl, combine the flour, salt, and sugar and mix with your hands until evenly distributed. Add the yeast to the flour mixture.
4. Add the dry ingredients to the wet ingredients and use the mixer with the dough hook to mix until just combined. Add half the butter and mix on low speed until it is completely incorporated.
5. Turn the mixer to medium speed and add the remaining butter.
6. Mix until the dough has reached full gluten development (or the point where the dough forms a small but strong window when stretched). This will get easier with time, the more you practise, the better your brioche will be.
7. Place in a bowl that has been greased with butter, wrap tightly with plastic wrap and refrigerate overnight.

To Bake:
1. Preheat oven to 365 degrees Fahrenheit.
2. Line baking trays with parchment paper. In a small bowl beat one egg with a pinch of salt.
3. Shape dough into small balls and place on a tray two inches apart.
4. After shaping the dough, brush the rolls with the egg wash and allow to sit at room temperature until they double in size, about 10-15 minutes. Brush the rolls again with the egg wash and bake until dark brown, about 8 minutes rotating once.

Wednesday, May 26, 2010

Curry Cumin Popovers


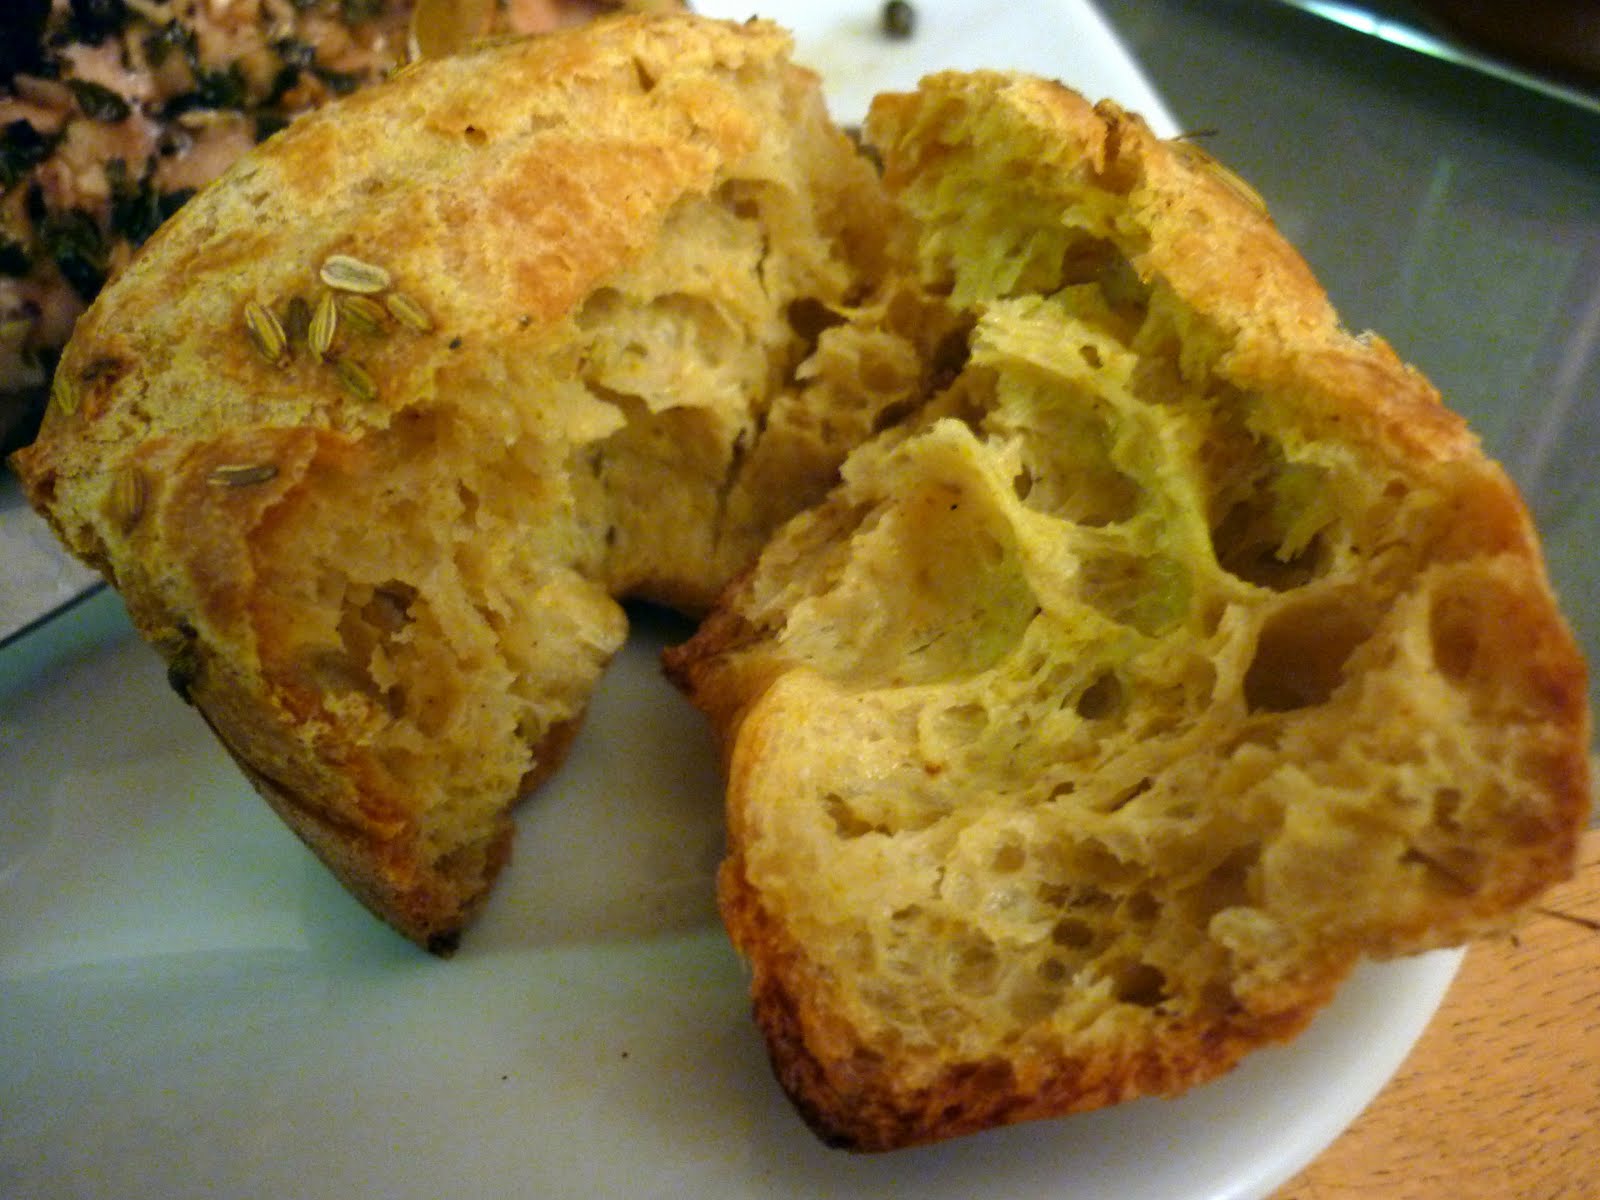
The first time I ever experienced a popover was with my mom at a cafe in Union Square, San Francisco. I remember loving their light fluffiness on the inside and the slight crispiness on the outside. I believe they are called "popovers" because of the way they pop over the sides of the muffin tins. Last Wednesday evening was a special occasion: we were having a small belated Birthday dinner for Andy. He just returned from Chicago the night before and I wanted to make a nice, healthy and tasty dinner meal to celebrate his birthday. I decided this would be the perfect opportunity to bust out with some popovers. These are super easy to make and very tasty. Since the popovers were going to have Indian spice flavors I decided to serve these with hot mango chutney. The sweetness and mango chunks of the chutney were the perfect compliment to the subtle spice and fluffiness of the popovers. These are easy and delicious and sort of elegant - perfect for a weeknight meal.
                           
Curry Cumin Popovers

Ingredients:
1/2 teaspoon cumin
2 large eggs
3/4 cup soy milk
1/4 cup water
1 tablespoon unsalted butter, melted
1 cup minus 2 tablespoons all-purpose flour
1/2 teaspoon salt
1 teaspoon curry powder
2 tablespoons fennel seeds

Directions:
1. Preheat the oven to 375 degrees. Spray nine cups in a muffin tin.
2. In a bowl, whisk the eggs, milk and water. Add the butter in a stream, whisking. Add the flour and salt and whisk until the mixture is slightly lumpy, then add the curry and cumin powder.
3. Divide the batter evenly among tins and sprinkle the fennel seeds over the popovers. Bake on the lower third rack of the oven for 40 minutes. Cut a slit on top of each popover with a small sharp knife and bake for 5 minutes more.
 

Tuesday, March 23, 2010

Cheddar Biscuits

I love biscuits. They are versatile, good for any meal, and the perfect comfort food. This batch came out particularly flaky which was nice. I found this recipe on the blog, Laura's Recipe Collection and made some changes to create a slightly healthier version. I cut the butter and used olive oil instead. This makes the biscuit keep it's moistness and it's much better for you. Each layer was like moist biscuit goodness. My good friend, Soma, was visiting and we decided to prepare a Southern comfort feast which included cheddar biscuits, potato salad, deviled eggs, tomato soup and a chocolate mess cake for dessert. In the way that grilled cheese is a lovely accompaniment to tomato soup, these biscuits work the same magic. Any leftovers can be frozen and reheated to provide for the same warm, flaky, fresh taste. I'm sure these would be good with fresh cracked pepper, chili flakes or fresh dill. Happy Biscuiting!

Cheddar Biscuits

Ingredients:
2 cups flour
1 tablespoon baking powder
1 1/2 teaspoons kosher salt
3/4 stick unsalted butter, melted
3/4 cup olive oil
1/2 cup cold buttermilk, plus a little more
1/4 cup fake eggs
1 heaping cup grated cheddar cheese

Directions:
1. Preheat the oven to 425 degrees. Line a baking sheet with parchment paper.
2. Mix the flour, baking powder and salt in a large bowl. Pour in the butter, olive oil, buttermilk, and fake eggs. Whisk well, until everything is incorporated. Fold in cheddar cheese, adding more if you think necessary just until combined
3. Place the dough on a lightly floured surface and roll out into a rectangle that is 2/3" thick.
4. Using a sharp knife that is dusted with flour, cut the dough into triangular wedges. Lightly brush the top of the biscuits with buttermilk. Bake the biscuits for 20-25 or until they are slightly golden brown on top.

Monday, March 8, 2010

Blue Corn Muffins

On a recent date to Bobby Flay's Mesa Grill, I was inspired to: 1.) cook Southwestern food, 2.) do something with chutneys, and 3.) bake experimental breads. We went for brunch and it all began with a basket of freshly baked muffins. These were not just any kind of muffins; they included jalapeno cornbread muffins, coffee cake, cornbread with raisins, and a blue corn bread muffin. The basket came accompanied by a little tray of a delicious sweet and spicy mango chutney that both my boyfriend and I agreed was one of the best parts of the meal. Did I mention the bread basket was bottomless? Yes, we finished our first basket and they replenished it before our main entrees arrived! So my first Mesa-inspired cooking experiment were these blue corn muffins. I couldn't find blue cornmeal in Whole Foods, our local health food store, or Gristede's! Finally I found it in Kalustyan's, officially making that place my favorite store. I also picked up a small jar of Roland's spicy mango chutney which is not as tasty as Bobby Flay's but it will suffice until I learn how to make that too. Blue cornmeal has a slightly sweeter taste than yellow cornmeal and I felt like the texture was a little softer too, but I could be wrong about that. I tried to research the difference between blue and yellow cornmeal but I couldn't find anything useful so if any of you know, please share!

Blue Corn Muffins
(Makes 12 muffins)

Ingredients:
1 cup blue cornmeal
1 cup all purpose flour
5 teaspoons baking soda
1/4 cup white sugar
1 pinch salt
1/2 cup fake eggs (or two real eggs)
1 cup soy milk
1/2 cup olive oil
1/2 cup corn kernels

Directions:
1. Preheat the oven to 350 degrees. In a bowl mix together the cornmeal, flour, baking powder, sugar and salt. Stir in the eggs, milk and olive oil. Add in the corn kernels.
2. Pour batter evenly into muffin baking tray. Bake for 30 to 35 minutes or until a toothpick comes out clean. Let muffins cool for 10 minutes on a rack before serving with mango chutney. Enjoy!