"The people who give you their food give you their heart" - Cesar Chavez


Saturday, January 30, 2010

Classic Caesar Salad

Every now and again you just have to get back to your roots and find those foods that remind you of home. For me, one of those foods is caesar salad. My mom used to be a waitress at this sort of fancy restaurant and when she quit she went into the kitchen and tore a page out of the top secret recipe book. She wasn't leaving without that caesar salad recipe. I've never had a caesar salad as good as my mom's but this recipe that I'm about to share isn't the "top secret" recipe from the restaurant, it's actually just an incredible amazing combination of ingredients I picked up at local markets. Ordinarily I wouldn't blog about this since there is really nothing to it, but it tasted so good and crispy and the pictures came out quite nice, that I would feel guilty to not give a shout out to my very quick and easy and very store bought caesar salad.

Ingredients:
1 head romain lettuce, torn
1/2 cup freshly grated parmesan, plus more for serving
3-4 rye toast crisps
Whole Foods ceasar dressing

Directions:
1. Put the torn lettuce in a bowl and crumble the rye toast crisps over it. Add the grated parmesan and lightly toss. Just before serving add the ceasar dressing and toss just until incorporated.

Friday, January 29, 2010

Pecan Crusted Salmon Served with Garlicky Green Beans

If you haven't already noticed, I love salmon and will grill it, steam it, broil it, roast it, bake it. My cousin Megan was coming over for dinner and I wanted to prepare something healthy and filling. Salmon is low in saturated fat and calories but high in protein and it is packed with essential fatty acids. I recently learned that Omega 3 essential fatty acids are essential because they cannot be made by the body but they must be obtained by food. The omega 3 fats in salmon have many cardiovascular benefits too. This meal is very delicious and was inspired by a recipe I found on Sprouted Kitchen blog. I definitely have to give a big shout out to my cousin Megan who did the food layout for the photograph, this is one of the prettiest food pictures I have taken to date and all credit goes to her! As a combination of foods the succulent salmon tastes great with the garlicky green beans and the pumpkin biscuits; add a glass of white wine and you are set! Click here to see the recipe for garlicky green beans!

Pecan Crusted Salmon
Adapted from Sprouted Kitchen

Ingredients:
4 fillets of Wild Pacific salmon
1 cup of pecans, very finely chopped (hooray for food processors!)
1/4 cup whole wheat flour
1/8 cup fake eggs
Olive oil

Directions:
1. Preheat the oven to 400 degrees. On three separate plates or shallow bowls pour the fake egg, the whole wheat flour and the crushed pecans.
2. Heat a non stick skillet over medium heat and add some olive oil. Working with no more than two fillets at a time place them flesh side down into the flour, then the egg and then the pecans. Add the fillet nut side down, skin side up, into the pan and sear for 3 minutes. Flip it over and sear for three minutes on the other side. Repeat the searing for all the fillets and place them on a baking dish and bake until you have your desired doneness, about 8 minutes for me.

Thursday, January 28, 2010

Garlicky Roasted Green Beans


Green beans are very delicious and even though I love to eat them, I realized that I have never cooked them myself! I was preparing a winter season meal and green beans seem very winter season to me. I used haricot green beans and they still maintained their crispness while taking on a strong garlic flavor. These were served with pecan crusted salmon and pumpkin biscuits and I shared the leftovers with some roasted chicken. It's fair to say these green beans are a wonderful accompaniment to pretty much anything. I added some lemon zest for fun and more for appearance but it actually added a lovely punch and I'd like to add more lemon zest next time, or perhaps orange zest. I used a bag of frozen green beans which I just let sit out for a while, until they are soft enough to absorb oil and garlic.

Garlicky Roasted Green Beans

Ingredients:
1 lb green beans
1 shallot, diced
6 cloves garlic, diced
Olive oil
Zest of one half a lemon
Freshly ground pepper

Directions:
1. Preheat the oven to 425 degrees. Place the beans on a pan and drizzle with olive oil, sprinkle the shallots and garlic on top and toss the beans around to incorporate.
2. Bake for 30-40 minutes, until tender and then mix in the lemon zest and serve.

Wednesday, January 27, 2010

Pumpkin Biscuits

I love biscuits. I didn't realize this love until I had ham biscuits at my boyfriend's home. Then I had the renowned biscuits of bliss from Clinton Street Baking Company. So my love for biscuits has been proven. I'm ready to try any sort of biscuit and put anything on it, which is what sort of happened with these. I had a can of canned pumpkin and I wanted to use it up while it's still chilly weather. I ended up serving these biscuits with pecan crusted salmon and green beans. Later I shared them as a late night snack with Swiss cheese, mustard and roasted chicken, yum yum YUM! These biscuits are easy and fun to make and slightly addictive. For the first time I used a Paula Deen recipe from the Food Network and made my own little changes. Unfortunately due to my camera and lack of natural lighting when I made these, they look like overly orange cheese puffs. My apologies, pictures are hit or miss.

Pumpkin Biscuits
Adapted from Paula Deen's Sweet Potato Biscuits

Ingredients:
1 1/2 cups all purpose flour
2 heaping tablespoons sugar
4 teaspoons baking powder
1/2 teaspoon salt
1 cup canned pumpkin puree
1/4 cup softened butter

Directions:
1. Preheat the oven to 450 degrees.
2. Whisk the flour, sugar, baking powder, and salt in a large bowl. Add in the pumpkin puree and butter and mix to make the dough soft (you may need to add more flour if it's too moist or 1 tablespoon of milk if it's not moist enough).
3. Turn the dough onto a floured surface and toss lightly until the outside of the dough looks smooth. Roll the dough until it is 1/2 inch thick and cut with a biscuit cutter or a mason jar. Place the biscuits on a creased pan and lightly brush with melted butter.
4. Bake for about 15 minutes or until the tops turn a light golden brown. Enjoy warm!

Tuesday, January 26, 2010

Mushroom Pad Thai


On another recent China town grocery store trip I picked up some bags of different kind of mushrooms; Bunapi (White Beech Mushrooms), Bunashimeji (Brown Beech Mushrooms) and Enoki. These mushrooms are typically used in Japanese dishes; Enoki is especially used in hot pot dishes. I've developed a strong likening for Japanese mushrooms; they tend to be more meatier and chewy than other mushrooms I'm familiar with. In Japan, the most popular mushrooms are shitake and enoki. Below is a picture of the beech mushrooms. The reason they are called beech mushrooms is because they usually grow on beech trees that have fallen down. They don't have an aroma but their texture is fantastic!
                            
Here is a picture of all the lovely mushrooms in their packaging. Enoki on the left, white beech on top right and brown beech on bottom right.

I have never cooked tempeh before so I thought this would be a great time to learn and make this a vegetarian dish. Tempeh is Indonesian and it's made from the fermentation of soy beans to solidify into a brick. I learned that it is high in protein, fiber and vitamins! Here is a picture of the tempeh I used.
                           
Mushroom Pad Thai

Ingredients:
3.5 ounces of white beech mushrooms (Bunapi)
3.5 ounces of brown beech mushrooms (Bunashimeji)
3.5 ounces enoki
Tempeh, cut into small strips
Tofu, cut into small strips
Pad Thai noodles
10 garlic cloves, diced
Fish sauce, about 2 tablespoons
Mushroom Sauce (can use Oyster sauce), about 2 tablespoons
Chinese cabbage, shredded
Canola oil

Directions:
1. Soak the noodles in a bowl of cold water for about 30 minutes, or until they feel ready. Wash the mushrooms thoroughly and trim their stems.
                            
2. Heat canola oil in a wok over high heat. Add the garlic and constantly stir with a wooden spoon to prevent burning. When garlic is golden and fragrant, add in tofu and tempeh and saute until the tempeh turns golden brown.
3. When tempeh is brown add in the mushrooms and drizzle with 1 tablespoon of fish sauce and 1 tablespoon mushrooms sauce. Saute until the ingredients are all incorporated. Add in the noodles and 1 tablespoon more of fish sauce and mushroom sauce, mix until incorporated. Turn off heat, add in the shredded cabbage and cover until ready to serve.

Monday, January 25, 2010

Cake Art Brownies with Walnuts and Coconut


One of my best friends from California, Erica, sent me package which included an 8 inch circular pan and some INCREDIBLE brownie mix from her mom's store. Erica's mom, Susan, has a lovely cake art supplies store in San Rafael, California called Cake Art Supplies. It has everything from pans and rolling pins, to detailed cake toppers and brownie mix! I was the fortunate recipient of the brownie mix. You can see everything the store has on it's website. They even have macaroon mix and carrot cake mix! I had three friends coming over for dinner and I decided to make these brownies and add in walnuts and coconut. The brownies were divine. Moist and slightly gooey on the inside, a little bit thicker on the outside. Four people polished off the entire brownie pan...so much for bringing leftovers to work!

Cake Art Brownies with Walnuts and Coconut

Ingredients:
1 lb brownie mix from Cake Art Supplies...(Gasp! we finished 1lb of brownies?!)
3 oz plus 1 tablespoon water
3 oz oil (I used canola oil)
1/2 cup walnuts, chopped
1/2 cup dried coconut flakes

Directions:
1. Preheat the oven to 375 degrees. Mix together the water and brownie mix for 1 minute.
2. Add oil and mix for a few minutes. Stir in walnuts and coconut. Pour batter into an 8x8 pan. Bake for 22-25 minutes. (While brownies are baking run and get milk or ice cream, or both).
                             

Friday, January 22, 2010

Stewed Tomatoes

While visiting my boyfriend's home I had the pleasure of trying one of his favorite dishes - stewed tomatoes. It's easy to understand why he likes this dish so much, it was delicious and definitely inspired me to bring this back to my tiny kitchen to replicate it for a comfort food dinner. Stewed tomatoes are essentially baked tomatoes and toasted bread, the amount and type of bread is completely up to personal preference so don't take this recipe as a strict one to follow. Feel free to use up whatever bread you have in the cupboard and as much or as little as you want! Since I don't have a toaster I made a mistake of thinking I could broil the bread for as long as I would toast it and it wasn't until my boyfriend exclaimed "Is something burning!?" that  I had a Cher in Clueless moment and took out a pan of charred black bread from the oven. So if you are planning to broil your bread then broil it on low for about 45 seconds per a side. I definitely attribute the deliciousness of this to his mother's home canned tomatoes from her garden. Below is a picture of one of the two jars we got to take back to NY.
                              
Here is a picture of her stewed tomatoes! The first I ever tried. Made with love and no strict recipe, stewed tomatoes are a dish you can definitely be flexible with.
                            
Stewed Tomatoes

Ingredients:
1 quart of canned tomatoes
8 thick slices of whole wheat Italian rustic bread
2 teaspoons sugar
butter

Directions:
1. Toast the bread until golden brown on both sides. Spread both sides of the toast with butter.
2. Pour the canned tomatoes into a glass baking dish. Break apart the toasted bread and mix it into the bowl of tomatoes using a fork to evenly incorporate the bread. Sprinkle the sugar on top.
3. Preheat the oven to 375 degrees; bake the dish until it is heated through and slightly bubbly on top, about 25-30 minutes. Enjoy!

Thursday, January 21, 2010

Classic Chicken Pot Pie


Recently on my walk home from work, I decided to stroll into the Housing Works thrift shop on East 23rd street. I am especially fond of this thrift shop because their prices are great and they get truck loads of new items daily. I always leave with some interesting book, accessory or, most recently, kitchen appliance. Last time I was there I found a lovely round white casserole pot with the words "From Oven to Table" inscribed on the bottom. For $7.00 I excitedly took this pot home and three words kept going through my mind: chicken pot pie. This dish is extreme comfort food. The options for variations of your classic chicken pot pie are endless. I'm very excited to make this again using different meats and vegetables. I came across a chicken pot pie recipe on the blog Closet Cooking which I altered. I served this with a bowl of stewed tomatoes for the ultimate comfort dinner; the only thing missing was apple pie for dessert. I'm looking forward to using my little white $7 pot for fish pot pies and vegetable pot pies and many more pot pies that have yet to be discovered.

Classic Chicken Pot Pie

Ingredients:
2 tablespoons butter
3/4 white onion, chopped
4 stalks celery, chopped
1 carrot chopped
8 button mushrooms, chopped
1/2 cup all purpose flour
1 1/2 cups low sodium vegetable broth
1 cup soy milk
1 pound cooked chicken, shredded
1/4 cup white wine
1 cup peas
1 cup corn kernels
Pepper
Garlic powder
1 pie crust
1 egg white

Directions:
1. Melt the butter in a large pan; add the onions, celery, carrots and mushrooms and cook until tender, about 10-15 minutes. Sprinkle the vegetables with ground pepper and garlic powder.
                          
2. Mix in the flour and let it cook for a minute.
3. Mix in the vegetable stock and the milk. Bring to a simmer for 10  minutes.
4. Preheat the oven to 400 degrees.
5. Add the chicken, white wine, peas and corn. Season the mixture with pepper and garlic powder
6. Pour the filling into a pie dish or other oven-to-table pot
7. Place the pie crust on top of the mixture and cut three slits on top
8. Brush the egg white on top of the pie crust
9. Bake the dish until the crust is golden brown, about 25 minutes. Let cool for about 5 minutes. Enjoy!


Wednesday, January 20, 2010

Aunt Sue's Red Lentil Soup


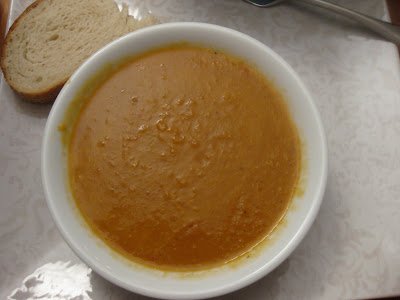
My Aunt Sue is a phenomenal chef; every meal I've ever had of hers has been delicious and healthy! I was excited to receive an email of one of her soups and so my cousin, Megan, and I decided to make it on Tuesday night. We made it a little spicier than we were expecting, well, it was sort of an accidental spiciness because I put in a little too much chili flakes. Luckily, the heat wasn't too much and it still tasted great! We enjoyed the soup with a fresh loaf of garlic French bread and a salad. I had some more of the soup for lunch the following day. Sue usually adds the juice of one lemon to her soup but we didn't have one, well Megan went to get one, but we forgot to use it. Still it tasted great! Also, some ideas for garnish are cilantro or even some grated parmesan.

Aunt Sue's Red Lentil Soup

Ingredients:
Olive oil
1 large onion, chopped
2 garlic cloves, diced
1 tablespoon tomato paste
1 heaping teaspoon cumin
1/4 teaspoon kosher salt
1/4 teaspoon ground pepper
2 teaspoons chili pepper flakes
1 quart chicken stock
2 cups water
1 cup red lentils
1 large carrot, peeled and diced

Directions:
1. In a large pot, saute the diced onions with olive oil until they are translucent. Add in the garlic about half way through.
2. Stir in the tomato paste, cumin, salt, pepper and chili flakes and saute for a couple minutes.
3. Add in the chicken stock, water, lentils and diced carrots and simmer on low for about 30 minutes.
4. Using an immerssion blender or food processor, grind the soup. Be sure to not grind the soup too much, the soup should still be chunky.

Tuesday, January 19, 2010

Southerwestern Stuffed Acorn Squash

My good friend Katie and her boyfriend John were coming over for dinner and I wanted to make something seasonal, acorn squash, with a little Tex-Mex style since they are from Southern California. I came across this easy recipe on Eating Well and changed it up for a delicious dinner for four. I served it with warm corn tortillas and crispy Cesar salad. This meal was ready in no time, fresh and flavorful. You can easily switch up the cheeses, meats, veggies and even the squash! I also think it would be tasty to add in crumbled tortilla chips.

Southwestern Stuffed Acorn Squash
(Serves 4)

Ingredients:
2 acorn squash, halved and seeds scooped out
1 lb ground white turkey
1 white onion, chopped
1 red bell pepper, chopped
2 cloves garlic, minced
2 tablespoon cayenne pepper
1 1/2 teaspoons ground cumin
2 cups cherry tomatoes, chopped
1 15 ounce can black beans, rinsed
Several dashes of hot pepper sauce
1 cup grated Swiss cheese

Directions:
1. Preheat the oven to 375 degrees. Lightly coat a pan with olive oil and place the acorn halves cut side down on the baking sheet. Bake until tender, about 45 minutes.
                               
2. While squash is baking lightly coat a large skillet with olive oil over medium heat. Add the turkey and break apart using a wooden spoon; cook until it is lightly browned, about 5 minutes. Add the onion and bell pepper and cook, stirring often, until it is softened, 3-5 minutes. Stir in the garlic, cayenne powder and cumin and cook for 30 seconds. Stir in the tomatoes, beans and hot sauce. Cover, reduce the heat, and simmer for 10-12 minutes, until the tomatoes are soft and juicy.
                               
3. When the squash halves are tender, remove them from the oven and reduce the heat to 325 degrees. Fill the halves with the turkey mixture and sprinkle the Swiss cheese on top.
                               
4. Bake the stuffed acorn squash until they are heated through and the cheese is melted, about 8-10 minutes.
5. While squash is baking heat up some corn tortillas for the left over turkey mixture. A good tip for quickly warming corn tortillas is to heat them over an open flame on the stove top; flipping using tongs.
                                     

Monday, January 18, 2010

Pork and Chive Dumplings


Over the weekend my boyfriend and I made a trip to Chinatown to explore the groceries and markets and get some inspiration for a Chinese feast. We are both HUGE fans of dumplings and our favorite dumpling place is Vanessa's in the Lower East Side. We will try dumplings anywhere though. For our first effort making dumplings we went for the classic pork and chive combination. We were both surprised with how delicious these dumplings were! Honestly, they are the same as, if not better, than Vanessa's dumplings! Wrapping and steaming the dumplings is half the fun, we set up a little assembly line to make about 40 dumplings. We decided to steam them on our brand new wok which came with a special rack especially for steaming. We're looking forward to making many more dumplings and trying out different combinations, especially because you can only buy dumpling wrappers in packages of 200. We went to an awesome  grocery on Mott street below Grand. This place had every type of meat, fresh or frozen, and sushi grade fish. We purchased regular dumpling wrappers and vegetable dumpling wrappers and ground pork, chives, ginger and some fun dipping sauces. The grocery also had a section with cooked foods to order a la carte and it was an entire block long with one entrance on Mott and on entrace on Elizabeth. Below is a picture taken from inside the grocery.

And here are our wonderful little dumpling wrappers!

Pork and Chive Dumplings
(Makes about 40 dumplings)

Ingredients:
Dumpling wrappers
2/3 lb ground pork
2 teaspoons minced fresh ginger root
4 cloves garlic, minced
1 1/2 green onions, thinly sliced
1 tablespoon soy sauce
1 tablespoon sesame oil
1 1/2 tablespoons fake egg
2 cups finely shredded Chinese cabbage

Directions:
1. In a large bowl, combine the pork, ginger, garlic, green onions, soy sauce, sesame oil, fake egg and Chinese cabbage. Mix well with your hands to evenly incorporate all the ingredients.
                             
2. Place one heaping tablespoon in the center of the dumpling wrappers and lightly moisten the edges of the wrapper to seal close. Place the dumplings on a lightly floured surface until you are ready to cook them. I recommend working on lightly floured wax paper.


3. Heat water in a wok over high heat, bringing the water to boil, place the steamer rack over the water. Steam the dumplings for about 15-20 minutes.
                        
Enjoy them with dumpling dipping sauce or make your own by combining Sriracha and soy sauce with some hot peppers!
                         

Sunday, January 17, 2010

Elaine's Delicious Chocolate Covered Peanut Butter Ritz Sandwiches


While visiting my boyfriend's family over the holidays, his mother, Elaine, made the most fantastic and so simple desserts! The concept is perfect: two ritz crackers sandwiching a layer of creamy peanut butter and the whole lot drenched in melted chocolate and left to harden. Sound addicting? Chocolate and peanut butter can do that to you. I definitely ate most of these chocolate Ritz sandwiches of goodness and I am still thinking about them! I realized how wonderful Ritz crackers are (I promise this is not a paid advertisement) but seriously, they go wonderfully with cheese, dips, peanut and chocolate! Ritz crackers are definitely an important provision. They can be stored in an airtight container. Elaine gave us a little container of them for a New Year's party, but they didn't last with me in the car.

Ingredients:
Ritz crackers
Creamy peanut butter
Chocolate bars or chocolate chips
Butter

Directions:
1. Make little happy sandwiches of Ritz crackers and peanut butter.
2. Melt the chocolate and butter in a steamer over a pot of boiling water.
3. Using tongs to hold the sandwiches together dip them in the melted chocolate and twirl them to coat. Place on a sheet of wax paper to cool and harden. Enjoy!
                              

Friday, January 15, 2010

Celadon's Delicious Scalloped Potatoes


The first time I tried scalloped potatoes was in October, this was the second time and they keep getting better! For my roomate, Celadon, scalloped potatoes are the ultimate comfort food (I can't believe I've been missing this comfort food in my life for so long!) When scalloped potatoes were served at Celadon's high school cafetiria in Atlanta, Georgia, she would be going back for thirds and fourths! I think California high schools need to get with the program and start serving scalloped potatoes. Celadon made this delicious dish and served it with a mustard and wine marinated chicken and sauteed spinach. I think scalloped potatoes make everyone happy, sort of like her  bacon quiche! For this dish she went off a recipe by Emeril for Cheese Scalloped Potatoes but ending up tweeking it to make it more delicious.

Celadon's Delicious Scalloped Potatoes

Ingredients:
1/4 cup chopped onion
2 tablespoons butter
2 tablespoons flour
1 1/2 cups milk
1 cup grated cheddar cheese
Salt and pepper
3 potatoes, peeled and thinly sliced

Directions:
1. Preheat the oven to 350 degrees.
2. In a pan over medium high heat cook the onion and butter until it is soft then add the flour for 2 minutes while whisking. Whisk in the milk until thick and bubbly. Remove the pan from the heat and add 3/4 cup of cheese, stirring until it is melted, season with salt and pepper.
3. Layer half of the potatoe slices in a bowl or dish and sprinkle with salt and pepper. Cover with half of the sauce. Put on the next layer and the remainder of the sauce and sprinkle with remaining cheese.
4. Cover and bake until the potatoes are tender, 30-50 minutes depending on your oven.
mmmmmmmm....

Thursday, January 14, 2010

Spicy Roasted Brussel Sprouts


My mom used to boil brussel sprouts and I thought they were disgusting....barely digestible, or I had to have a lot of other stuff on my fork to get one down. I learned that this cousin to the cabbage can be delicious when roasted! When roasting these sprouts it's important to not be afraid of the dark brown spots, those areas pack the most flavor! Roasted brussel sprouts and hummus is a great combination. These are super healthy too with a lot of vitamin A and C. My friend Andy who was over for dinner when I made these admitted that these were the one food he didn't like, his mother also boiled them apparently. Well, I'm happy to say we are both converted to roasted brussel sprout eating.
                           
Spicy Roasted Brussel Sprouts

Ingredients:
Brussel sprouts, halved
Olive oil
Garlic powder
Chili flakes
Cayenne pepper

Directions:
1. Pre heat the oven to 400 degrees
2. Wash the brussel sprouts and drain, cut them in half and place them in a bowl. Drizzle them with olive oil, garlic powder, chili flakes and cayenne pepper. Toss to coat evenly.
                              
3. Place them on a pan and bake for 30-40 minutes. Until golden brown and dark brown spots appear.

Wednesday, January 13, 2010

Basmati Rice Pilaf with Peas, Cashews and Golden Raisins


When I was a kid, my mom used to mix cashews and rice and I loved it. This dish adds a lot more to rice than just cashews, but it's filling and healthy and slightly Middle Eastern tasting and goes great with fish or chicken kebabs. I was making this for two people but made too much, what a surprise, and ended up having leftovers for the next couple of days and it still tasted great! The juicy peas, sweet golden raisin and salty cashews are a great combination, all tied to together with a sprinkling of z'artar and ginger. I think you could also amp up this pilaf by adding some red wine to it or using wild rice instead of basmati rice.
Basmati Rice Pilaf with Peas, Cashews and Golden Raisins

Ingredients:
Brown basmati rice
Frozen green peas, thawed
Roasted cashews
Golden raisins
Za'atar
Ginger powder
Sesame oil
Lemon juice
Olive oil

Directions:
1. Cook the basmati rice according to the directions on the bag
2. In a pan over medium heat saute the green peas, cashews, and golden raisins with a bit of olive oil. Drizzle some sesame oil as the cashews become moist from the nut oils and the raisins plump up. Add in the cooked basmati rice and add the za'atar, ginger powder and lemon juice. Mix gently to incorporate all the ingredients. Taste and add more za'atar or ginger or lemon juice. Serve warm and eat the leftovers cold :)

Tuesday, January 12, 2010

Salmon Baked in Banana Leaves


My good friend Andy is leaving on a trip to Taiwan with his family tomorrow so I wanted to pull together a nice meal before he jets off. During my lunch break I took a stroll through my favorite store in NYC, Kalustyans and found banana leaves in the frozen section! They were frozen and by the time I got home and ready to make dinner they had thawed and were good to be used. I was surprised to discover that the banana leaves I had purchased was two very very long leaves. I didn't have the space to unroll the leaves in my tiny kitchen unfortunately so the only picture I got was the leaves all rolled up. I marinated the salmon as usual. It was fun to wrap the salmon fillets in the banana leaves and even more fun unwrapping them. I've never had such tender and perfectly flaky salmon, it must be from baking it in banana leaves. I served this with a brown basmati rice pilaf and spicy roasted brussel sprouts. Unfortunately I forgot that brussel sprouts are the one food Andy doesn't like! Luckily he was willing to try them again and ended up enjoying them, or at least he said he did to be nice. I made three fillets so I could have the third for dinner the following night. I kept it wrapped in the banana leaf and wrapped that in a sheet of foil - I surprised that it still was perfectly tender and flaky the night after. These salmon-banana-leaf pouches need very little time so it's best to wait until the other parts of your meal are ready before you put it in the oven.
                             
Salmon Baked in Banana Leaves

Ingredients:
3 fillets of salmon
Orange juice
Soy sauce
Minced garlic
Ginger powder
3 squares of banana leaves

Directions:
1. Place in the salmon fillets in a zip lock back, pour in the orange juice, soy sauce, minced garlic and ginger powder. Seal and gently moved the fillets in the bag so all the juices get evenly incorporated. Place in the refrigerator and let marinate for 40 minutes.
2. Preheat the oven to 400 degrees. Gently rinse the banana leaves, place a fillet skin side down on a banana leaf square and fold the leaf to form a pouch around the fillet. Do this with all the fillets and place them on a pan.


3. Place the pan in the oven and bake for 12 minutes. Remove pan and serve the salmon-banana-leaf pouches.